a better backyard burger

Just in time for the summer finale of fireworks we share some burger tips. Labor Day weekend means spending time outside and enjoying some summer salads and grilled food. Follow these tips to make the juiciest burger your grill can turn out.

First, start with the meat. A combination of fatty meat and lean gives you a good texture for a moist burger. This combination will help you achieve a burger that won’t dry out while cooking.

Avoid taking the meat out of the refrigerator, forming patties, and going straight to the grill. You want the meat to be room temperature. Take the hamburger meat out of the refrigerator a half hour before grilling. Season the meat and form patties. Allow the patties to come to room temperature covered in plastic wrap in a baking dish on the counter.

How do you season your burgers? Go with the proven science of the kitchen at America’s Test Kitchen. Flavor your meat with a few teaspoons of soy sauce and Worcesteshire sauce. It deepens the meaty flavor. Add some garlic and onion powder and Kosher salt.

http://m.npr.org/news/Books/163002343

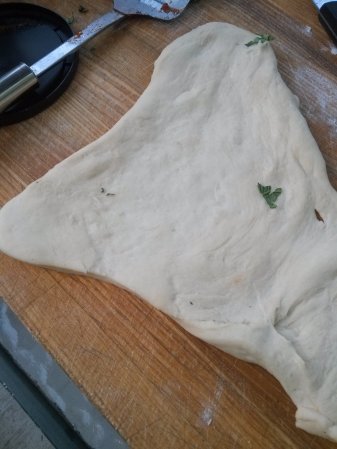
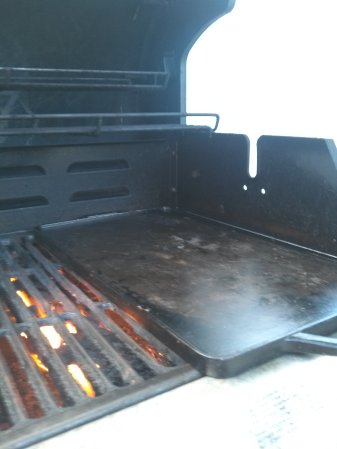
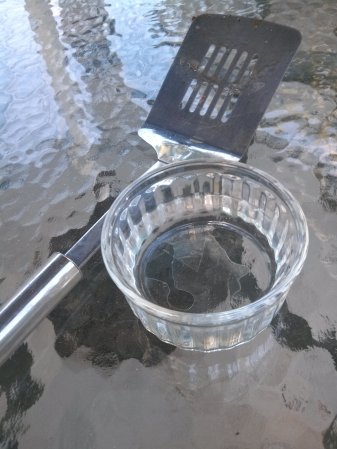
When you prepare your patties, make an indent in the top of the patty. The meat will expand when cooked and this will keep a nice even layer. Caramelization is key to a good burger. It gives the outside of the burger a bit of a crust. You can pick up one of these griddles, seen below, at any cooking appliance store.

Pre-heat on the grill over the flames for a few minutes. When the burgers hit the grill they immediately start to take on a nice sear.

DON’T press down on the burger with a spatula. People, with aprons, in smiling barbecue commercials are doing it. But, they’re pressing all the juices out of the burger. This is the number one reason you will end up with a disappointing and dry burger.

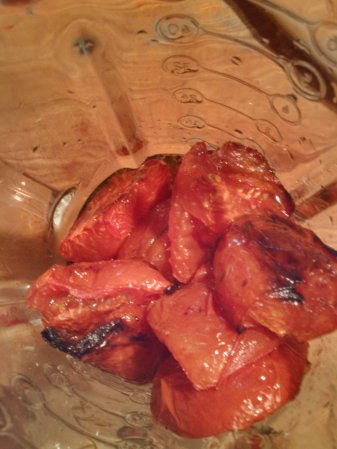
After the burgers have cooked several minutes on each side add slices of cheese for those having cheeseburgers.

The perfect ingredient for a juicy burger isn’t in a jar or a bottle. What is it?

Water.  Splash a little water on the grill near the burgers. This will send up a cloud of steam. Quickly, close the lid and trap that steam inside with the burgers. Finish for another minute. Remove from grill and allow the burgers to rest.

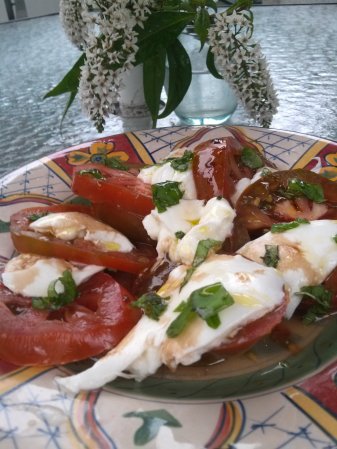
Also, consider stepping out of the bland hamburger roll routine. Lightly toast some English muffins. Better yet, grab some brioche rolls. Their rich, buttery flavor is the perfect companion for your juicy backyard burger.

Check in tomorrow for a big announcement from the blog!

for the love of a summer lasagna

Summer weather and lasagna. Maybe these aren’t two things you think of together. But you should.

What’s bursting in the garden at this time of year? Juicy tomatoes and herbs. Celebrate the season and the bounty of fresh produce with a lasagna highlighted by a tomato sauce that only gets heat from being in the oven. This is not a deep flavored sauce that simmers on the stove when the wind is howling outside. It’s a basic tomato sauce that has a summer tomato flavor paired with fresh basil.

Thanks to companies who have come up with no-boil lasagna noodles this dish can come together in the kitchen with a few simple steps. When purchasing the no-boil noodles go for a box of noodles that contain flat noodles. Most boxes provide enough noodles for a three layer lasagna.

Chop some garlic and shallots and place in a cold pan with about 1/4 cup of Extra Virgin Olive Oil. Use your good olive oil. When there are a just a few ingredients you want to use the best. Gently warm for about 1 1/2 minutes and pour into a blender. Allow to cool.

Use about 8-10 medium size tomatoes. Remove the top of the tomatoes and the seeds inside. Toss in the blender with the oil, garlic and shallots. Add some Kosher salt and puree mixture until smooth. Add a handful of fresh basil and pulse the blender once for a quick chop.

Spoon some tomato sauce in the bottom of a lasagna pan and smooth to coat. Assemble four of the no-boil noodles in the pan. Coat the noodles with enough sauce to cover the surface area of the noodles. This is important to help the noodles bake evenly. Uncovered parts of the noodles can be unpleasantly crunchy. Continue adding some creamy ricotta cheese and shredded mozzarella and parmesan. Sprinkle some chopped basil and start with the next layer.

Finish the top layer with sauce and your combination of cheeses. Set oven at 350 degrees. Before placing your assembled lasagna in the oven give the dish a tap on the counter once or twice. This helps everything settle. It also startles the dog who has been patiently dozing nearby hoping for some extra cheese.

The lasagna is ready in about 50 minutes to an hour. Yes, you’re turning the oven on in August. Leave the kitchen while it bakes. Allow the lasagna to cool for about 10 minutes. Sprinkle some more wisps of basil on top and grated parmesan.

The bright flavors of summer tomatoes and sweet basil mix with the melted cheese. A no-cook tomato sauce and no-boil noodles make for a summer meal outside with a nice glass of wine. And an extra piece of cheese for the dog. He was very patient.

still summer please

The back-to-school commercials start earlier every year. We’re at the halfway mark of summer. Enjoy the moment and celebrate the season.

Every year we try and grow a different variety of tomato. We learned years ago that cherry tomatoes can become extremely invasive. They reseeded and took root everywhere from an empty, broken pot to a crack in a path behind the house.

A summer tomato straight from the vine is one of the best ingredients for lunch or dinner outside on the patio. We have a nice batch of Kumato tomatoes. A Kumato tomato is considered to be a brown tomato. The Kumato tomatoes are a bit smaller than some of the larger, bright red varieties available this time of year.

The dark amber layers of the Kumato tomato make for a colorful caprese salad with some creamy mozzarella and basil leaves. Dressed simply, with extra virgin olive oil and balsamic vinegar, the salad makes for an easy, no-cooking-required meal.

Buffalo mozzarella is a regular offering in Italy. According to The New York Times when you get a fresh ball of mozzarella in a local cheese shop in Italy it’s assumed that it is buffalo mozzarella. http://www.nytimes.com/2012/10/14/magazine/buffalo-mozzarella-craig-ramini.html?pagewanted=all&_r=0

You need to specifically ask for a cow milk mozzarella if that’s what you want.

Trader Joe’s carries a variety of buffalo mozzarella that we found last summer. The buffalo mozzarella in Italy is pulled and created that day. The cheese suspended in a tub of water at the local Trader Joe’s is the closest we will get.

The slightly pungent flavor of the cheese pairs perfectly with the Kumato tomatoes. The dark stripes of the Kumato tomato makes the mozzarella look as white as clouds in a summer sky. The salt draws out the tomato juices, that mix with the fruity extra virgin olive oil, and the tart contrast of the balsamic vinegar.

There are just a few ingredients that make this dish. A nice twist to this salad is a Himalayan pink salt we also found at Trader Joe’s. The sparkling, bubble gum pink crystals add a briny salt flavor.

You want to use any sea salt with a little moderation since it has a very pronounced taste. Be sure and have a crusty loaf of bread to soak up the juices left behind from your caprese salad. And make every effort to enjoy these days of summer dining. It goes too fast.

the heat is on

It has been a scorcher with punishing heat. One day, the only reason we got out of the pool, was to make lunch and then dinner.

When the temperature is climbing toward triple digits, salads are a reliable dinner staple. The summer produce is providing some picture-perfect vegetables and fruit. The tomatoes in our garden are a little behind schedule because of a rainy month in June.

What can you do to help the summer tomatoes catch up to the rest of the season after a soggy start? Help them along with a little aluminum foil. Spread some sheets of foil at the base of the plants to help the sunlight reflect back up to double the amount of sun. It will help with sun absorption, which is crucial to the tomato plant, to ripen and produce plump tomatoes.

Our tomatoes are racing to catch up to the rest of the growing season. But, the farmer’s market, that is less than 5 minutes away from us, has gorgeous Jersey tomatoes.

The more-orange-than-red colored tomatoes are ready to burst. They should be paired with just a few ingredients to enjoy their texture and juices.

One method for highlighting a fresh tomato is an adaptation of a classic steakhouse tomato salad. Slice some red onion wafer thin and marinate in red wine vinegar. We like to use a raspberry vinegar for another flavor note. This takes the edge off the aggressiveness of a raw onion and softens the crunch a bit.

The basil is getting bushier every day. Grab some leaves. In order to keep the basil growing at its best, always take the top leaves from the plant. It sends all of the growing energy back into the plant.

Slice the tomatoes and layer on a serving dish. If you don’t plan on serving immediately, hold off on sprinkling with Kosher salt. The salt draws out the delicate tomato juices. Salting too soon will yield sliced tomatoes sitting in a pool of juice. Salt when ready to serve to keep all the juices with the tomato slices.

For a flavor twist, splash a generous amount of Worcesteshire on the tomato slices. Layer the marinated onions and scatter with some chopped basil. The Worcesteshire adds a combination of flavors with some sweet molasses, garlic, and a zip of chili pepper.

We’re looking forward to our own tomatoes too. A tomato, in a dish for the dinner table, still warm from the afternoon sun, is a warm weather treat.

a girl and her grill

How do you grill on a really hot day? Jump in the pool first. Have the Mike’s Hard Lemonade resting on one side of the grill.

We had some friends over last summer, who stayed for dinner, after a day of kids in the pool. We chatted and gathered ingredients for dinner. Before you know it our friend said, “Wait a minute. Did you just make a pizza on the grill. You can make pizza on the grill?” Of course.

The key is to have one part of your grill as a space for direct heat and one area for indirect heat. That simply means flames on side and not on the other. And keep the pizza small. If the pizza itself is too large in size it’s difficult to handle.

You can buy pizza dough at the market from the refrigerator section. For the sauce, you can sauté onions and garlic in olive oil, and add a can of crushed tomatoes. We put some fresh oregano in the pot and simmer for about 5 minutes. For a really smooth sauce, you can puree in the blender.

The key is to use quality cheese. We use a mix of texture and cheeses with a soft blend of Fontina, a mild Provolone, and mozzarella. We blend the soft cheeses with some shards of nutty Parmesan, Romano, and tangy Asiago.  Poor quality cheese will make your pizza greasy. When you’re using a handful of ingredients, they should be top-notch since their flavors will stand out.

Divide dough in half to make two pizza pies. Coat with a little olive oil and begin to stretch the dough. Toss dough on the part of your grill with the flames underneath. Just make sure to place the oiled side of dough face down. Go with any shape that forms. Now, brush oil on the side facing up. When you see bubbles start to form, flip the pie. Give it about ten seconds and slide pie to the part of the grill with no flames underneath.

Spread sauce on the pie leaving an edge all around for the crust. Layer with the different cheeses. Add some oregano leaves, but not the basil yet. The oregano can stand up to the heat of the grill. Close the cover and allow the cheeses to melt together. This should take about 4 to 5 minutes.

Scatter some torn basil leaves over the top and allow to cool for a few minutes. Follow the shape of your pizza and slice into pieces.

The underlying smoky flavor the grill gives the pizza adds a twist to your traditional pizza. The sweet perfume of the basil is warmed by the melted cheese. The grill gives the crust a crunchy and chewy crust to highlight the fresh ingredients. Time for another cold one.

baseball, hot dogs and blogs

Nothing says summer like hot dogs on the grill. Summer vacation has officially begun. The guys were in the pool all day. Flip flops are left around. Summertime. The living isn’t exactly easy. But, it has slowed down a bit.

As a nod to the woman, who held the writing workshop, that got this blog started, we salute the all-American hot dog today. Take a look at the workshops offered here: http://www.cooknscribble.com/

Hot dogs two ways. One, with an easy-to-make homemade ketchup. The other hot dog version? What my guys call “baseball hot dogs.” The first time they ever saw a hot dog, piled high, with sweet caramelized onions, was at our local Staten Island Yankees Stadium. Here’s to Molly O’ Neill — an avid baseball fan.

Remember our roasted tomato method? Extra Virgin Olive Oil, a splash of balsamic vinegar, and a sprinkle of Kosher salt for some plum tomatoes? The tomatoes pick up a nice charred flavor from the grill. They can be a base for your homemade ketchup.

Look at the labels on commercial ketchups. There’s a good amount of sugar hiding inside ketchup bottles that kids squirt on their hot dogs. Buy organic or make your own. Using roasted tomatoes gives the ketchup a smoky flavor. The guys waved a white flag when they were presented with a homemade version using yellow tomatoes. They said yellow ketchup was “all wrong.”

Use 8 plum tomatoes for your ketchup. Slice the tomatoes and coat them with the olive oil and vinegar. Season with salt. Grill the tomatoes on each side. Allow to cool. Place in a blender and pulse a few seconds. In a saucepan, add tomatoes, 2 tablespoons each, of brown sugar, apple cider vinegar, and molasses. Add 1 cup of water, and place pan on a low flame. Simmer for 1 hour. The ketchup will reduce and thicken. Let your ketchup cool.

Add some fresh herbs. Place in a squeeze bottle. This will make about 1 cup of ketchup. It will last in your refrigerator for up to a week.

The second method, for caramelized onions, is simple. Use a Sweet Yellow Onion and slice thin. We posted a few days ago how to stabilize the onion for easy slicing. Place the onion in a pan with 1 tablespoon butter and 1 tablespoon olive oil. The oil will keep the butter from burning. It takes time to draw out the natural sugars of the onion. This process should take about 20-25 minutes. Stir occasionally.

Get a more concentrated tomato flavor in your ketchup by making your own. The apple cider vinegar brightens the flavors. Or, enjoy the taste of your grilled hot dog with the sweetness of the caramelized onions.

Fire up the grill. Blogathon for June 2013 is done!

grilled gazpacho

Grilled vegetables and a nice glass of wine. A perfect summer menu for outdoor dining. If you can arrange an evening breeze, and no mosquitoes, you have a thoroughly enjoyable dining experience.

For our grilled vegetable gazpacho, we like to use tomatoes as the base. Next, we use a combination of yellow and green zucchini, sweet Vidalia onion, a whole clove of garlic, red peppers, and yellow or orange peppers.

An evening of roasted vegetables and grilled bread can be rolled over into a panzanella, like yesterday’s post, for dinner the next day.

Another delicious option is to make a tangy, roasted vegetable gazpacho. The guys love it, and it’s a vegetable bonanza, as far as getting them to up their vegetable servings. Gazpacho traditionally uses raw versions of the vegetables. In that case, you want to get the vegetables at their peak of freshness.

Our farmers’ market has baskets of vegetables, on the lowest shelf, that have gone past their prime. They have become spotty, or withered, and are not at their most visually desirable appearance anymore.

They’ve also been marked down in price. This is where the grilling process is most forgiving. These are the vegetables that will get a stay on the grill before they become part of our roasted vegetable gazpacho.

Gather the vegetables mentioned above. Slice your loaf of bread and drizzle with extra virgin olive oil. Coat vegetables with extra virgin olive oil and sprinkle with Kosher salt.

Grill all vegetables except the head of garlic. Split down the middle and pour some olive oil on each end. Add a pinch of salt. Wrap in aluminum foil and place the pouch on a part of the grill where it’s not over a direct flame.

The garlic is done when the bulbs are soft. Allow everything to cool. The garlic will slide easily out of the papery skins. Slice vegetables into pieces. Cover with several cups of cold water.  Place in the blender and puree in batches. The chunks of grilled bread will thicken the soup.

If the consistency is too thick, the soup can be thinned with a bit of water. Chop some chives and basil leaves and add to the soup. Season to taste and add a generous splash of sherry vinegar. You can find it in most markets. It’s the ingredient that gives gazpacho a distinctive taste.

Pour the soup in a non-reactive bowl and chill for several hours. Read what makes a bowl non-reactive here: http://www.davidlebovitz.com/2013/04/what-is-nonreactive-reactive-cookware/

If you are preparing this for dinner tonight, the soup can go in the freezer for a good 45 minutes to an hour to speed up the chilling time.

If you want, hold back on some of the grilled bread.Slice some cubes of bread in a pan with some extra virgin olive oil and sliced garlic. Allow to cool and use the pieces as croutons to garnish. Top with some basil leaves. Take your top shelf extra virgin olive oil and circle the bowl with it to finish the soup.

The tangy notes of the sherry vinegar cut through the grilled vegetable flavors. The deep grilled flavor, in a chilled and refreshing soup, is a satisfying way to enjoy your summer vegetables on a steamy night.

perfectly pleasing panzanella

Panzanella is a simple bread and tomato salad using stale bread. It’s a great addition to a summer menu, as it can sit at room temperature, at a barbecue or backyard party. The idea is to use tomatoes, onions, and really, any other ingredients you like, to make a salad where the stale bread soaks up the juices of the ingredients.

Where there are ingredients in a recipe, we always like to elevate the flavors and grill them. This salad in particular benefits from the toasted flavors of the tomatoes and the bread. We use red onions in our panzanella.

As we mentioned in a previous post, we like to marinate the thin slivers of red onion, in red wine or balsamic vinegar, for a bit of time, to take the edge off the sharpness of the onion taste. By soaking the onions, it softens them, and mellows the flavor of a raw, red onion.

The panzanella is based on the idea of using up stale bread. We like to use fresh, or slightly stale loaves of bread, and toast them like we did in a past post about bruschetta. Bruschetta is basically toasted bread.

Drizzle a baguette with olive oil and place on the grill. When the bread is toasted, remove from the grill and rub with some cloves of garlic to infuse the bread with a garlic flavor. Grill the tomatoes, as we have done in previous posts, and allow to cool. Coat with olive oil, balsamic vinegar, and a dash of Kosher salt.

Allow the tomatoes to cool for about 20 minutes. The salt will draw out the natural juices of the tomatoes. You’ll probably be surprised at how much of the liquid, from the tomatoes, will be in the bottom of the bowl. Those juices are what the bread will soak up when you toss all the ingredients together.

Place all the ingredients in a bowl. Add a tablespoon of extra virgin olive oil. This is when you use the good stuff. Toss everything together. Take some basil leaves and stack them on your cutting board.

Roll the leaves up in a cigar shape and slice into ribbons. Scatter over the bread salad and mix together. We like to add some garlic chives and lemon thyme to liven up the flavors. Grate some lemon zest for a citrus taste in the background.

Play with the ingredients. Add sliced, seedless cucumbers, briny capers, or grilled zucchini. Some sprigs of minced rosemary leaves. Whatever tastes like summer in a bowl to you.

The last weekend of Blogathon 2013 starts tomorrow!

mystery meat

Google the word “tripe.” One of the first definitions to come up in a search gives you this explanation: The rubbery lining of the stomach of cattle or other ruminants, used as food. “Used as food?” Does that mean it isn’t actually food?

There are no pictures of tripe to accompany this post today. There are just random photos from the garden. Even if there were some tripe in the kitchen right now — you wouldn’t want to see it.

The other day we visited with food writer, Monica Bhide, and she shared the one food she just doesn’t enjoy. The woman who writes about food and spices on her blog, “A Life of Spice,” avoids the stalks of celery in the vegetable aisle at the market. She can’t stand the taste, and especially, the smell of celery.

Well, that means she has tried it at least once.

Today, we feature J.M. Hirsch, the Food Editor of  The Associated Press, and author of the blog, “Lunchbox Blues.”  http://www.lunchboxblues.com/ Watch for his book, “Beating the Lunchbox Blues,” the first book out by Rachael Ray’s new publishing venture, in September.

We asked Hirsch, “What’s your culinary kryptonite?” You guessed it — tripe. He shares that back in his college days he passed windows of butcher shops, on his way to classes at the University of Edinburgh, in Scotland, every day. He says that he didn’t know what the slimy looking substance was and finally gave in and asked.

“I had no idea what it was,” says Hirsch. “But it looked revolting. I finally asked a butcher one day on my way to class and learned it was tripe. That day, some 20 years ago, I decide tripe was not for me.”

Check out his blog and you can see Hirsch is guiding his son through the adventures of good eating. He chronicles what he packs for lunch for the 180 days of school on his blog. Read through a few posts, on what his son gets for lunch every day, and you’ll want to shake up your lunch routine too.

So, the man who writes about food, never actually tried the tripe. Would you? Hirsch describes his experience with passing it, in the shop windows, day after day. “The butchers always displayed massive heaps of tripe in the windows — giant slabs of white fleshy stuff, seemingly covered with gills.”

“I’m not a big supporter of writing off foods without having tried them,” says Hirsch. “I don’t let my son do that. But I make the exception for tripe.”

No arguments there. We believe fresh herbs can make anything taste better. We’ll pass on the tripe too.

 We’re heading toward the blogathon finish line in three more days!

exit music please…and a bowl of pasta

“Mom, since it’s my graduation, and the last day of school, can I choose what we have for dinner?” Sure.

Yesterday, was pajama day for the little guy and graduation for the fifth graders. Yet, they went to school one last morning to complete the days for the school calendar. Report cards were handed out too. Yesterday’s ceremony saw boys with suits and crooked ties. Girls, with curls in their hair, and wobbly heels.

For the ceremony, they were dressed up and photographed by family. Today, they were back in the classroom with their shorts and sneakers. It must have reminded them what they are really leaving. There were more tears and hugs, as they were dismissed today, than yesterday. Teachers comforted them and wished them well.

My older guy was sad. Sad for the familiar. Sad to leave his class and his teacher. Sentimental sad.

His choice for dinner? Our roasted tomato vodka sauce. Start with using the olive oil, balsamic vinegar, sprinkle of Kosher salt, method we have done in past posts. If your just joining the conversation, you can scroll through to find this easy-to-prepare method.

Start with about 8 plum tomatoes. Roasting the tomatoes deepens the tomato flavor. This element stands up well, to the richness of the splash of light cream, that is added at the end.

Slice a head of garlic in half. Drizzle with olive oil (not your expensive one) and sprinkle with Kosher salt. Wrap in aluminum foil and place on your grill. Not over the direct flame, or it will burn. Place on indirect heat.

The garlic is roasted when you can smell it and the cloves are soft. Allow to cool.  The garlic will squeeze right out of their skins.

After the tomatoes come off the grill, allow to cool. If you are pressed for time, you can place the tomatoes and garlic directly into the blender. Be careful though. Anything hot creates steam.

Once you place the top on the blender, cover with a towel and a firm hand. Slowly pulse. Follow that with a continuous blend. If you don’t take this precaution, the pressure from the steam will blow the lid off the blender. There’s the origin of the expression.

When the tomatoes and garlic are blended, place in a pot. Add a cup of water. If you want to use vodka, cut the amount to half a cup. Simmer, on a low flame, for about 45 minutes. Sauce will reduce.

When sauce is reduced, take off the heat and cool for ten minutes. Stir in 1/4 cup of light cream and blend. Add some torn basil leaves and add any salt to taste.

Serve with linguine, or spaghetti, and your favorite grated cheese.

Goodbye elementary school for my older guy. What a great time he had!

There are four days left of the blogathon. We’re almost there!