School’s Out for Summer

Not much to share today since a second-grader and a sixth-grader have closed out their careers. The end of June is a whirlwind of activity, and wrapping things up and finishing projects. To celebrate, we are heading out to a favorite restaurant to have dinner.

We’ll pick up the discussion tomorrow where we left off about salads and vinaigrettes. Tonight we will order the favorite salad we get when we go to this place. It has briny olives, broccoli spears and tiny bits of fresh mozzarella. It feels like the place to be as we have marked other milestones at this restaurant. That’s what a restaurant can mean to you. It feels like another kitchen and table that makes you relax and enjoy a meal with family and friends.

There is a quote from an author that anyone dealing with school schedules, baseball practices, art classes and music lessons needs to remember in the roller coaster years of raising children.

“The days are long but the years are short.” -author Gretchen Rubin

Dressing Up Your Salad

Yesterday we talked about salad dressings and how much hidden sugar there is in those bottles lining the shelves of the market. With a few simple steps you can be mixing up your own vinaigrette to toss your salad greens in your bowl.

Follow the easy steps to make a basic vinaigrette to keep your salads tasty and healthy. One problem people run into is creating a salad that is weighed down by too much dressing or vinaigrette. Start out with a lighter hand as you can always add more dressing later. Once it’s in there, you can’t take it out.

After you mix your vinaigrette, pour it along the inside rim of the salad bowl. This is also a good idea if you are not serving the salad immediately.

Your salad and vinaigrette are prepped ahead of time but you toss it at the last minute so the leaves are lightly coated and ready to be served. Nothing spoils a salad faster than having too much dressing weighing down the leaves, or one that was tossed with dressing, and not served immediately.

Remember your basic ratio for a vinaigrette is 3 parts oil to 1 part vinegar.

BASIC VINAIGRETTE

3 tablespoons extra-virgin-olive-oil

1 tablespoon vinegar or any acid (like fresh-squeezed lemon or orange juice)

This amount is about right to serve four salad servings.

You can explore using other oils and vinegars. If making your own vinaigrette is new for you, it may be surprising to you how many different options are available. Try different vinegars like red wine vinegar, balsamic vinegar or white balsamic vinegar.

You can also find other oils for your salad that come in different varieties. Some oils will have a very strong taste like walnut oil or a neutral flavor like grapeseed oil.

If you are just starting to explore the avenue of making vinaigrettes buy your ingredients in the smallest bottles possible and commit to the larger size when you have settled on something as an ingredient you know you like.

Making your own vinaigrette is so simple and fast. It’s much better for you since you aren’t using the pre-made bottles of dressing with ingredients like added sugar that isn’t part of a healthy eating plan.

If you missed the post about plastic bottles of extra-virgin-olive-oil being too close to the fiery hot grill. well here you go.

Tomorrow is the last day of school. See you then!

Easy-to-Make Vinaigrettes

There are some decent salad dressings available in stores. Look at the labels and read the list of ingredients carefully.

There is so much added sugar. According to many nutritionists making salads is one area where someone can be unknowingly sabotaging their healthy eating habits.

If you’re having a salad that means you are eating healthy. Right? Maybe not.

The problem isn’t with the tender leaves. It’s everything people put on top of those salad greens.

Once you hit the salad bar toppings the blue cheese crumbles, bacon bits and other items starts to take the calorie count way up. That’s before you add the salad dressing packed with hidden sugar. That salad can ruin your healthy-eating plan.

So, here’s what you need to make your own vinaigrette. The ratio is 3 parts oil to 1 part vinegar or any other acid like citrus juice.

The only part of the equation you want to make sure and follow is that you want to slowly add the oil to the acid. This helps the mixture emulsify and come together.

Place a kitchen towel under a bowl to keep it from slipping and having to chase the bowl around the counter as you mix. This way you have one hand free for the whisk, or kitchen fork, and the other hand can slowly stream the olive oil as you mix.

Does it make a difference if you use extra-virgin- olive oil? It does. The extra-virgin-olive-oil is the first pressing and yields a more delicate, fruity flavor. You want to use the extra-virgin-olive-oil for your dressings and vinaigrettes and save the regular olive oil for the saute pan.

Since there a few ingredients in a vinaigrette you want them to be quality ones. Their flavors are front and center and you want the vinaigrette to have clean and clear tastes to dress the leaves.

A vinaigrette is the perfect place to let fresh herbs round out the ingredients. Some just-picked herb leaves can give a vinaigrette some perfume from basil or an added lemon flavor with lemon thyme.

Experiment with different ingredients like honey, mustard, citrus juices and zest, cream, and herb combinations. Remember, the ratio is 3 to 1 and the possibilities are endless.

Looking for ideas to get started? Stop back tomorrow when we discuss some basic vinaigrettes to get you started!


Meatless Monday Pasta Dinner with a Tomato Pesto

Here’s a Meatless Monday dinner idea we use and it’s a hit with the guys. We came across this recipe in an issue of America’s Test Kitchen’s Cook’s Country or Cooks Illustrated.

There are so many cooking magazines that land in the mailbox.

This is an Italian recipe that is a riff on pesto replacing the basil and pignolia nuts with tomato and almonds.

It’s a nice combination of flavors and the guys prefer this to a traditional pesto.

We have tinkered with different ways to make this dish and the version they like best is the one where we added a smoky flavor to every layer of ingredients.

We grill the tomatoes and get a nice char on the skins. In the winter months, we roast them in the oven.

We’re in full swing with grilling season so the tomatoes are prepped with olive oil and balsamic vinegar.

Roasted garlic is a must for this dish. Roasted garlic tastes nothing like the raw or slightly cooked garlic slices. The garlic softens and develops a sweetness.

When you roast the garlic the skins are left on. Slice an entire head of garlic and place on some aluminum foil.

Drizzle with a little extra-virgin-olive-oil and a sprinkle of Kosher salt. Close the head of garlic together and wrap in aluminum foil. Place the packet on the grill where there isn’t a direct flame.

Now for the almonds. They add a nutty flavor to this tomato pesto that give it an interesting almond presence in the background.

It’s good when used in a raw state but toasting the almonds and releasing their essential oils brings all the grilled, roasted, toasted notes together. Don’t walk away from these! They toast quickly.

Add some cheese to these ingredients as you would when making pesto. Parmigiano Reggiano or Parmesan. Grab some basil leaves and add to the mix.

We like to serve this tomato pesto with a tubular pasta like penne or ziti. It works with any type of pasta you like. Use any type of tomato you prefer too.

This tomato pesto dinner is fast and easy to pull together on a weeknight.

You need to boil pasta in the kitchen but everything else can get ready outside while you enjoy some type of beverage on a beautiful evening. This bloom came out overnight in one of the pots near the grill..


We are heading into the last full week of the blogathon for 2014.

As of tonight, there is officially no more homework! It’s all good as we slip into summer. Tomorrow is Tuesday!

compound butters add layers of flavor

Compound butters are a delicious addition to your menu ideas all year long.

The butter flecked with bits of cinnamon and flakes of brown sugar that make your waffles taste even better on a cold winter morning can also be the dab of delicious for your summer corn laced with the kick of ancho chile powder, and studded with chives, for the ears of summer corn or hefty steak coming off the grill.

The combination of flavors is only up to you and your imagination. And the compound butter adds a layer of ingredients and taste to everything from the breakfast menu to the lunch items and the dinner table offerings.

Compound butter sounds like something that is a high-end part of menu choices. It requires no more effort than bringing a cold stick of butter to room temperature and adding some  ingredients.

It can be savory for a steak or grilled chicken breast, with some rosemary and thyme leaves, or sweet with mint from the garden melting on a strawberry shortcake or a peach cobbler for the summer dessert selections.

The no-salt butter is left on the counter to get to room temperature. Once it has softened, you can make the choice for the butter to be used as an ingredient to add to a lunch or dinner dish or something that lends itself to the sweeter side with a breakfast or a dessert dish.

These kinds of flavored butters are sold in markets at an inflated price because they are offering a customized kind of butter. Don’t pick these up in the market when it is so easy to make your own and be in complete control of the ingredients.

Sure, a chive butter placed on top of a steak when it is still hot off the grill is a nice slick of flavor for the grilled meat. But a compound butter melting down on top of it with some chives and oregano from the garden is an explosion of flavor.

Unwrap a stick of butter and decide which direction you want to tackle. It’s the same for savory as it is for sweet. You just have to use the background of creamy butter and splash whatever ingredients you desire across the canvas.

A compound butter can add another profile to dinner, breakfast or dessert. It’s up to you how you decide to use it.

Tomorrow is another day!

Frozen

The reality of seasonal ingredients is that when the time comes for your favorite fruit or vegetable to say good-bye they are gone until the next growing season.

Some items have shorter windows than others. This is where your freezer can help extend your enjoyment. It’s a common misconception that frozen foods are inferior to their fresh offerings.

This isn’t the case and the frozen food industry is on a campaign to help change the public’s thoughts on the frozen food aisle.

Frozen food makers are trying to spread the word that fruit and vegetables are frozen at the peak of freshness.

They have been trying to get the word out that freezing food is like pressing the pause button on nature and capturing the essence of the fresh fruits and vegetables at their best.


Corn, berries, peas, and other fruit and vegetables, are all frozen at the exact moment when they are in a premium state. They can be added to soups, stews or omelets at the end of cooking time as they just need to be warmed through or brought to room temperature.


Use this idea to capture and preserve the state of summer by making a berry compote. A compote isn’t quite a jam and you can cook down the berries into a thick mixture that can be stored in the freezer and retrieved at a later date when you want to be reminded of the tastes of summer.

The compote can include lemon juice and zest, or other citrus notes, and herbs from the garden like mint or the perfume of basil.

Boil down the berries and allow to cool. The compote can be put in plastic freezer bags and labeled with the date of storage. Lay the bags flat so that they can be stacked one on top of another.

Play with combinations of flavors. You can do one that is an all strawberry compote or one that is a mix of berries. The whole idea is to use your freezer to hold the season’s flavors and enjoy them when you miss them the most. Think that bowl of berries is magic for you in July?

The happiness you’ll have when you are reminded of these flavors in the cold winter months will make you glad you took the time to make a compote and store it in the freezer.

The combinations of flavors are limitless. Frozen fruit compote helps you remember the berries of summer on a winter day. Frozen is good.

So, there it is. Embrace the frozen produce. And post number one hundred!

See you tomorrow!

Get the Cheese on the Grill

The cherries in the market are still in supply. This is the time of year when we play with all sorts of ways to use this fruit.

Last year during the blogathon of 2013 we made cherry bruschetta with goat cheese.

There is something about the tang of goat cheese’s creamy texture and the sweetness of cherries that makes the perfect topping for toasted bread.

When you are looking at your grill and trying to get some inspiration for a dish to prepare cheese might not be the first food to come to mind.

Grill a wheel, or a slice of the wheel, of some brie cheese and the rind gets some straight grill marks. The meltingly soft center reaches the right level of creaminess.

The subtleness of brie goes well with a bit of smoky flavor it gets from briefly resting on the grill.

First, wash and clean your cherries to get them ready for going a round with the cherry pitter. Sliding those pits out of the cherries is a quiet activity for a summer day.

Slice the baguette lengthwise and drizzle with some extra-virgin-olive-oil.

The grill will give the rind of the brie some grill marks and lightly melt the creamy inside. Grill the brie about 45 seconds each side.

While you’re at the grill, also place a baguette, or any loaf of bread you like, on the grill to toast.

Give the pitted cherries a light chop to make some smaller pieces.

Chop some fresh thyme leaves or pull off the leaves and chop. If you have super-fresh thyme from the garden or the farmers’ market you can use the tender stems.

If the thyme is a bit older and the stems are tougher you want to use just the thyme leaves Sprinkle some Kosher salt in the cherry mixture.

We also grow a type of thyme called lemon thyme which adds a bright flavor to the cherry mixture.

Cut a piece of the creamy grilled brie and the toasted baguette.

Place some of the cherry mixture on top. Grilling the brie brings out the subtle flavor and the sweet cherries with thyme make a nice contrast for the crunchy toasted baguette.

Pour a glass of wine and sit outside. Use this combination of grilled brie and cherries to enjoy the taste of summer.

The official first day of summer is tomorrow and so is post number 100 here at the blog! See you tomorrow.

dinner revisted with new starring ingredients

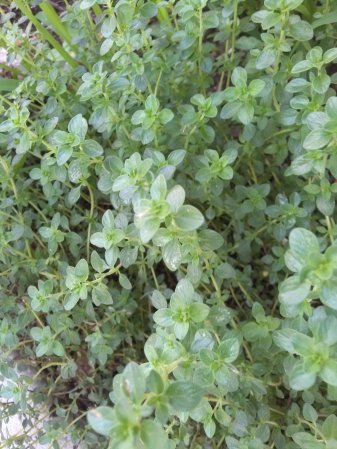
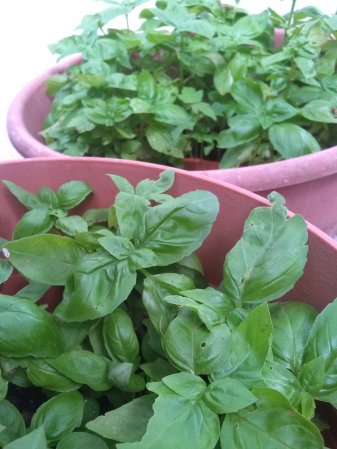
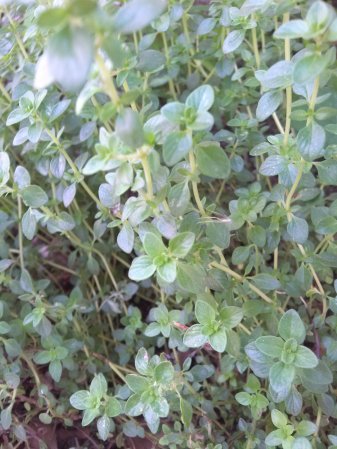
Last night’s dinner took advantage of the herbs that are bursting in the garden.

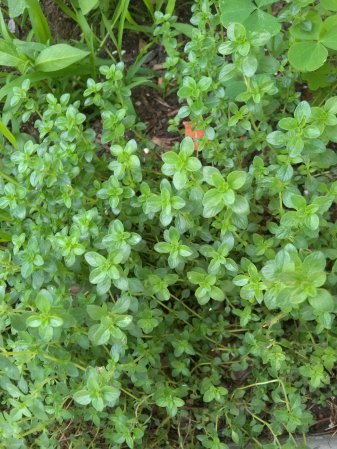
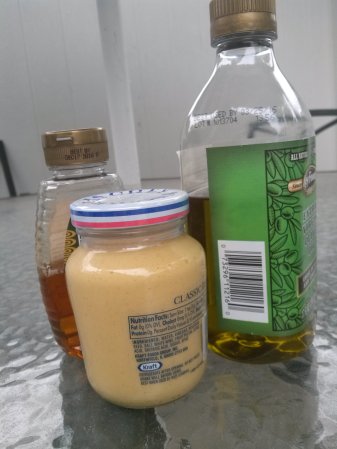
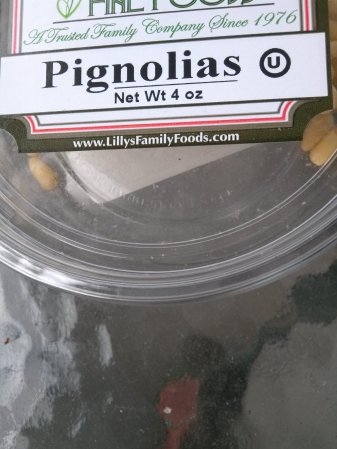
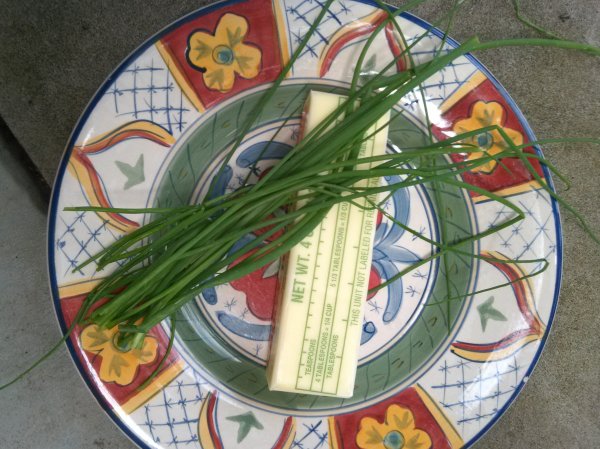
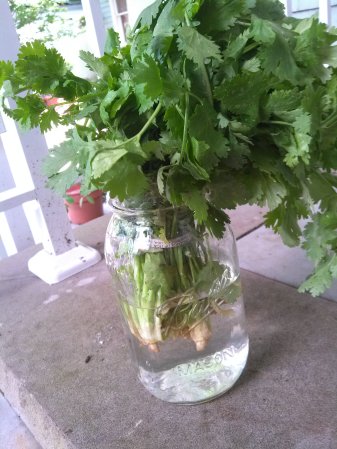
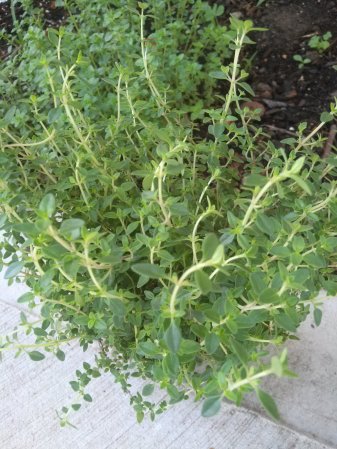
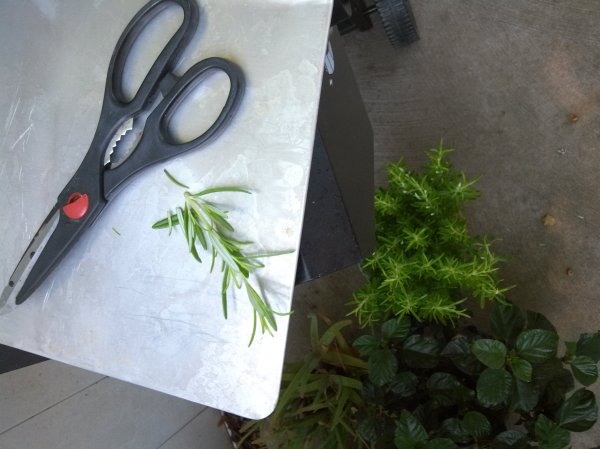
Farfalle is a favorite pasta shape for the guys. We picked some basil leaves, sprigs of thyme and a few chives for our pesto bow-tie pasta. The guys prefer a combination of green herbs to mix with the extra-virgin-olive-oil, cheese and pignolia nuts rather than a straight-up basil pesto.

It is a little more complex in flavor and they also like the pignolia nuts to be lightly toasted.

The herb pesto pasta is a go-to dish on Meatless Monday. We have taken the pledge to go meatless on Mondays for a healthy family diet and to be a part of the movement to make good choices for the environment.

The guys actually had to have it pointed out to them that they were no longer eating any meat dishes every Monday night. Creative menu choices meant they hadn’t even noticed.

The Meatless Monday movement also encourages parents and caregivers to take the pledge and cook with your children once a week. Monday is statistically proven as the day of the week most people are open to making healthy changes.

The guys will eat leftovers. But they don’t want it served the exact same way. That’s just wrong according to them. So, how to revisit the herb pasta bow-tie-leftovers? Add two of their favorite ingredients.

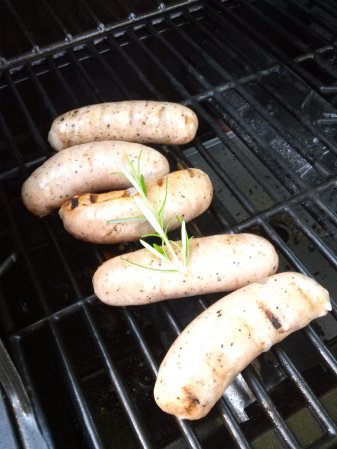
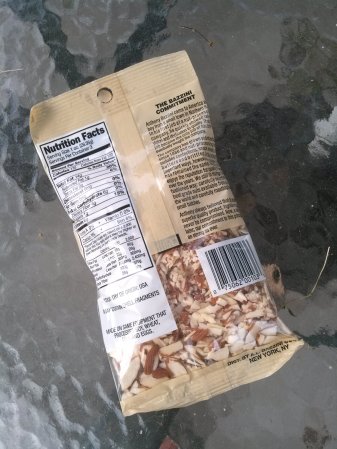
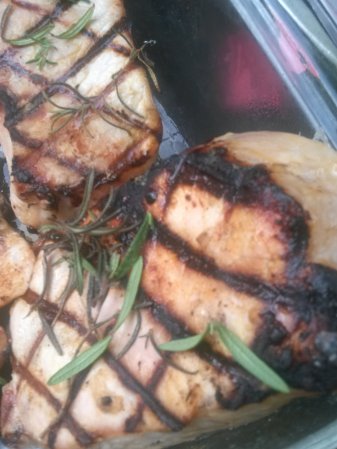
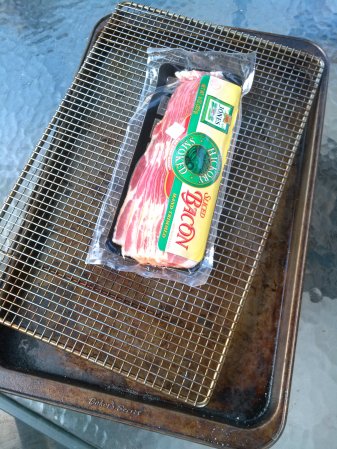
Organic chicken sausage and hickory-smoked bacon. Our market has only been carrying one brand of organic chicken lately and it’s very expensive. The organic chicken sausages are a good alternative for the guys to have some protein and the bacon pieces add a nice crunch to the dish.

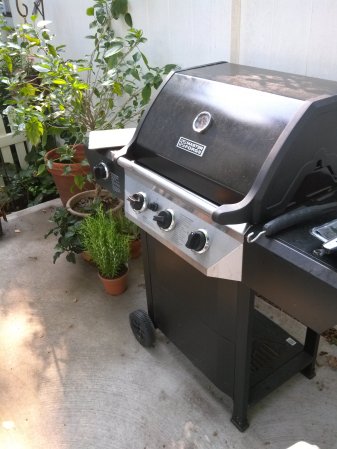
As we discussed in the previous post, think of your grill as an oven. The easiest and most flavorful way to cook bacon is in the oven. The same can be done on your grill.

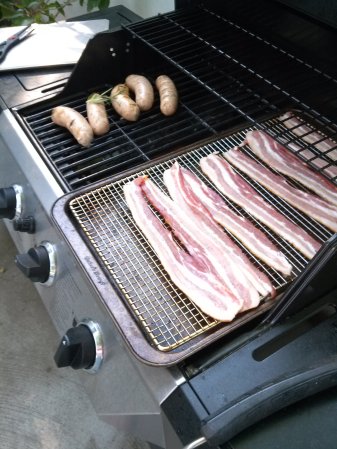
Set a wire baker’s rack over a sheet pan. Bacon in the oven, or on the grill, doesn’t curl and the residual fat from the bacon will drip through the wire rack and onto the sheet pan.

Just like we discussed in the previous post about having a  hot and cold zone on the grill the chicken sausages will cook on the hot zone and the pan will go on the cold zone.

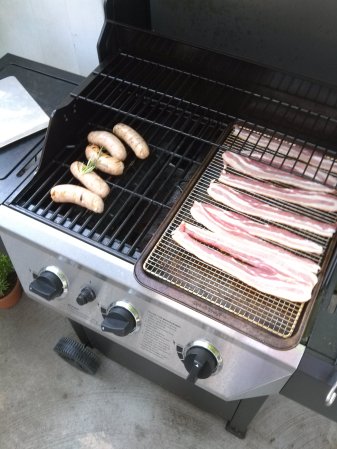
The pan itself won’t be sitting on a direct source of heat but will be surrounded by the heat from the grill when the lid is closed.

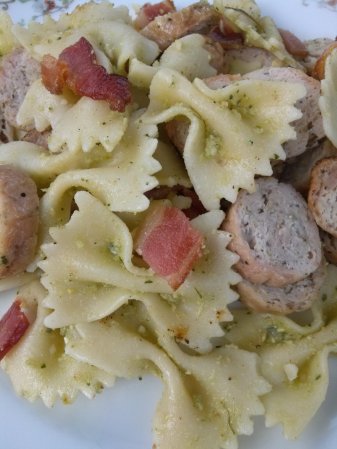
All ingredients are tossed together after the bacon cools, drains on some paper towels, and is crumbled into pieces. Don’t ever get those bacon bits in a can. There’s no taste like fresh cooked bacon.

Stop by at Parade and check out my post on ketchup for summer grilling season inspired by Bobby Flay.

http://parade.condenast.com/306337/aliceknisleymatthias-2/how-i-learned-to-make-homemade-ketchup/

Tomorrow is Friday. See you then!

memo from the grill and flying objects

This picture pretty much sums up summertime. Outside at the grill, kids in the pool, only to get out when dinner is ready.

We use our grill for just about everything. People forget that a grill, with the oven closed, is just like an oven.

Most gas grills will tell you what the internal temperature of the grill is with a thermometer on the hood. We baked these phyllo cups, for our dessert of berries, on the grill.

You can use the grill to trap the heat with the hood like an oven. These baked in the equivalent of a 350F oven. To make your grill work for you there needs to be a hot zone and a cool zone.

A hot zone is where items are placed directly over the flames. Most of the time you start off in the hot zone with your meat or vegetable over direct flames. This gives the item color and the distinctive grill marks you find on grilled food.

Say you’re grilling a thick pork chop. The outside will be nicely seared in a few minutes on each side but the inside will need to cook through some more.

That’s when you would move the pork chop to the cool zone and close the lid. This keeps the outer skin from burning which it would do if it stayed on the open flames.

By placing the chop on the cool zone and closing the oven you’ve created an environment where it can continue to cook the inside of the meat without drying out the pork chop.

A standard-size grill like ours typically has three rows of burners. We create a hot zone with the two first burners and a cool zone by leaving the third burner off.

By leaving the third burner off it keeps the internal temperature of the grill between about 350F and 400F which is perfect to cook a meat like a pork chop to produce a juicy and flavorful chop.

With the third burner on the temperature would be much higher and more like 500F. Recently, we were grilling a big brisket where we wanted a really high temperature. The brisket was cooking as the internal temperature of the grill soared.

Apparently the plastic bottle of extra-virgin-olive-oil sat a little too close to the wall of the grill hood where the high heat could be felt.

The bottle began to slowly melt, and when the pressure was just about right, the bottle cap shot straight up in the air and over the grill.

Dinner’s ready!

We continue through the third week of the blogathon!

getting more flavor from your steak and balsamic onion jam

There is nothing better than a steak from the grill for convenient cooking. Get a good cut of meat like a top round flank steak.

Marinate the steak and it’s on the grill to make a fast dinner that comes together in less than thirty minutes.

What are you marinating your steak in? The folks at America’s Test Kitchen can break down the science aspects of why two particular ingredients work to get the most flavor from your steak.

http://www.cookscountry.com/how_tos/8173-getting-to-know-umami-powerhouses

What are they? Soy sauce and Worcestershire sauce. Great flavor every time!

Did you know that Worcestershire sauce has been around since the 1800s and that the last names synonymous with the sauce, Lee and Perrins, were English pharmacists? They were the ones to first put the ingredients like molasses, anchovies and tamarind in the same sauce.

Here’s another little fun fact. Did you know that the original glass bottles were breaking when they exported the product out of England? The wrapper of paper was meant to protect the bottles from rattling against each other.

The paper is no longer necessary but the company still packages the bottles sealed in the distinctive wrappers.

The Worcestershire lends some interesting flavor along with the saltiness of the soy sauce to marinate your steak. If you are adding salt and pepper go a little shy on the salt so you don’t push the sodium content.

What to serve with the steak? We love to have thin slices of steak with an onion jam.

To caramelize onions slice them thin and put them in a pan with some extra-virgin-olive-oil and cook on a low flame. You don’t have to babysit the pan but stir them occasionally.

What happens is that the natural sugars in the onion start to caramelize and take on a warm brown color. It’s a slow delicious process. Note that when you first put onion slices in a pan it will look like far too many. But watch as they cook down into a tangled pile of caramelized goodness.

You can use 1 large onion or 4 or 5 shallots to make the onion jam. The acidity of the balsamic vinegar pulls the flavor together along with a touch of tangy Dijon mustard. Some floral notes of thyme from the garden are added as the jam comes off the heat.

BALSAMIC ONION JAM

1 large onion or 5 shallots

2 tablespoons balsamic vinegar

1 teaspoon Dijon mustard

5 0r 6 thyme sprigs

1/2 teaspoon Kosher salt

See you tomorrow!