no soapy tasting salad for some

Warm weather means outdoor dining. The problem with many dishes for the picnic table is they are mayonnaise-based. Mayonnaise and hot weather are not a good combination. Leaving a dish with mayonnaise out on a picnic table on a hot, summer day is a recipe for disaster.

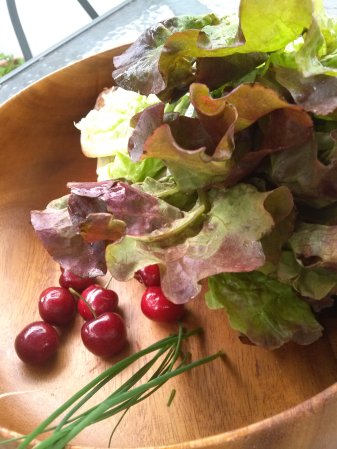
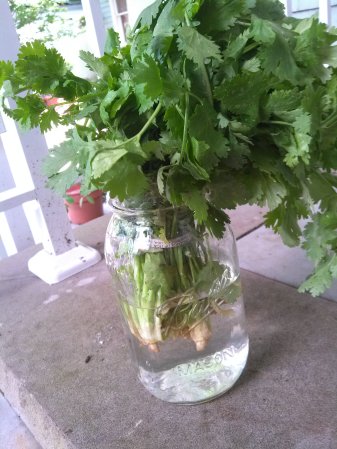
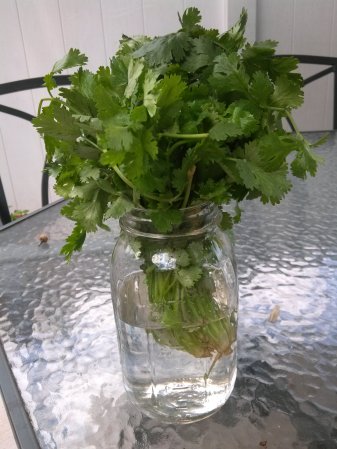
When the weather heats up, you want to make a dish with a few simple ingredients. This tomato salad is a staple for our summer dinner table. It calls for cilantro. There is no more polarizing ingredient than cilantro. People are either on board with this verdant herb or not.

It turns out if you don’t like cilantro it’s a genetic trait. If you are in the non-cilantro camp this article from The New York Times says the herb tastes like soap to a person.

 The next time someone protests to some cilantro in something you’re making keep this in mind. You wouldn’t want something that tasted like soap. http://www.nytimes.com/2010/04/14/dining/14curious.html 

Click on the link above and read how this herb was disliked by Julia Child.

We are in the camp of people who like cilantro. We have it in salads and salsas to put on grilled meats and vegetables.

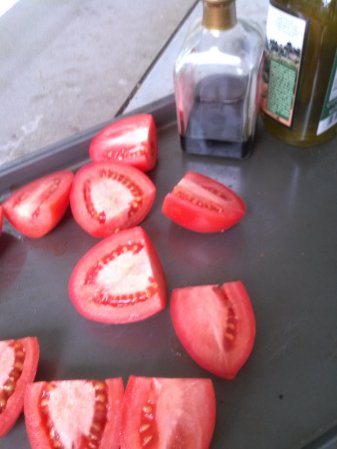
This simple tomato salad is made when tomatoes are in season. They are dressed in nothing more than extra virgin olive oil, balsamic vinegar, and Kosher salt. This is another example of when you want to use your good extra virgin olive oil.

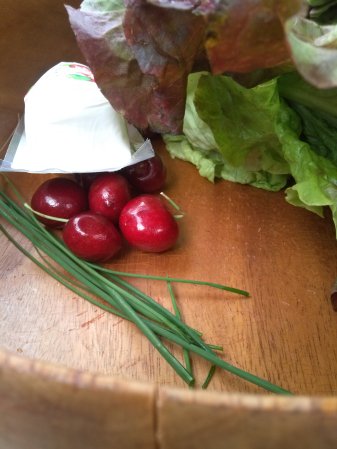
Tossed in a bowl with some red onion, and chopped cilantro, it’s a simple salad to add to your hot weather cooking nights. 

There are two steps that make a difference. Slice tomatoes and place in a bowl. Sprinkle them with salt and allow to sit for at least twenty minutes. This draws the juices out of the tomatoes. You want these juices pulled out before adding the oil and vinegar. It adds to the flavor of the salad.

This step is very important. Marinate the onions in the vinegar for 30 minutes. It will mellow the flavor of using raw onion. When the onions are raw they have a much more pungent, raw onion taste. Marinating them makes for a more mellow balance of flavors for the salad.

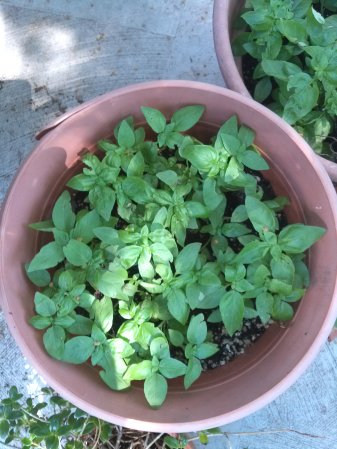
If you are not a cilantro person, no apologies necessary, simply use basil instead. Have a crusty loaf of bread on hand to soak up the tomato juices, mixed with olive oil and vinegar.

See you tomorrow.

Summer Tomato Salad

1 teaspoon Kosher salt

3 tablespoons olive oil

2 tablespoons balsamic vinegar

W4 or 5 plum tomatoes

1 red onion 

a handful of cilantro or basil, chopped

everything’s better with butter

Some friends were sharing how they drive some distance to a big box store for an item they love. What were they making this trip for? A specialty butter. One liked a butter with herbs. The other woman liked a sweet version her kids love on pancakes. They were also spending an unbeleivable amount of money for this butter as well.

You don’t have to pay high prices for items like a specialty butter. Make your own and play with ingredients. Here’s your version. A compound butter is a butter with added ingredients. If you can leave a stick of butter out on the kitchen counter for a few hours — you can make a compound butter.

The butter can be sweet for desserts or French toast. It can be savory with garlic and herbs. It is perfect to top a steak when it comes off the grill. The butter melts on the steak for a bit of sauce. That same butter can make your weeknight noodles go from plain, to full of flavor, in seconds.

Here are two versions you can make for your family. Allow butter to come to room temperature. Remove from wrapper and place in a bowl. Chop a handful of chives. Smash and chop 1 garlic bulb. Use Kosher salt and grind into a paste. Add to your bowl. Mix ingredients and press down on the butter with the back of a fork.

Place on some parchment paper in a line and wrap the butter in the shape of a log. Use your hands to shape. Twist the ends of the parchment paper at both ends. Return to the refrigerator to chill and firm up.

This savory butter can top a steak or a split baked potato. Drop in a pot of noodles. The heat from the noodles will melt the butter. This will distribute the herbs and coat every one of the noodles.

Here’s your sweet version of compound butter. It can be used with your desserts or breakfast items. Or, try it on grilled pork chops.

Follow the same steps for leaving a stick of butter out to come to room temperature. Zest an orange to get the oils in the skin that are bursting with citrus flavor. Add some chopped mint leaves. Drizzle some honey and mix it all together.

Or you can do a compound butter with cinnamon and sugar. That’s the butter that sparked the original conversation. Experiment with different herbs and flavors. See what your family likes.

Here comes the weekend and more ideas.

presto it’s pesto

You need to make dinner fast. Pesto to the rescue. There’s no cooking involved. A few ingredients can help you get a good dinner on the table any night of the week. Basil, olive oil, pine nuts, and cheese. This is the time of year fresh basil is right outside the kitchen door.

In Trapani, Italy they have another version of pesto. The pine nuts are replaced with almonds. Some basil is used. But, in this version, the main ingredient is tomato. And, when there are just a handful of ingredients –roasting adds even more flavor. Feel free to skip this step. It will still be a family favorite.

We can use the same method for roasting tomatoes in the oven as we did the other day. It was too rainy to get to the grill that night. Tonight’s forecast promises the same.

Grill or roast the tomatoes. Follow the same method for preparing the tomatoes as we did for the “un-pizza.” The acidity of the balsamic vinegar plays off the sweetness of the tomato. The slightly charred tomato skins, from the oven or the grill, take on another flavor when mixed with toasted almonds.

Add sliced almonds to a dry pan set on a low flame. Sliced almonds cook quickly and evenly. You don’t want to be working with whole almonds when you want to pull a fast dinner together. Keep the nuts moving in the pan. This will take about a minute. The nuts are done when the scent of the almonds is present. The edges of the almonds will appear toasted.

Finely chop one bulb of garlic. Sprinkle some Kosher salt on the garlic. Use the back of your knife to mash and turn into a paste.

Place in a blender with the roasted tomatoes, a dash of salt, some torn basil leaves, and  Parmigiano Reggiano. Pulse the ingredients. Now, with the motor running, slowly add your oil to the blender. This is one of those times when you want to open the cabinet and reach for the good extra virgin olive oil. The olive oil will not be heated in this sauce. The fruity flavor of the extra virgin olive oil is more pronounced.

Use a thread-type of pasta like linguine or spaghetti. Despite what a recent report said, put salt in your cooking water. You can read more about it here: http://www.finecooking.com/item/45952/salt-pasta-and-water

A salad, a good loaf of bread, and dinner is done.

5 ways to save money on organic food

Participants of the 2013 blogathon, over at Michelle Rafter’s site at Word Count, are guest posting today, June 12, 2013, on each other’s blogs. Today’s guest post is from Leah Ingram, founder of the wonderful blog, Suddenly Frugal, at http://www.suddenlyfrugal.com/. Head over and check it out. It’s packed with great money-saving tips you can use every day!

5 ways to save money on organic food
by Leah Ingram


When people ask me about my ability to extreme coupon, they always assume that I can’t find coupons for healthy food. They would be wrong.

In addition to finding ways to save money on produce–though those coupons are few and far between, I will admit–if you are a fan of organic food, you can find savings there, too. You just have to know where  to look.

Here are my 5 tips for being frugal and buying healthy, organic foods.
“Like” the brands you like on social media. Social media sites have become a treasure trove of coupons for all kinds of items, including organic food. Once you “Like” a brand on Facebook or start following a brand on Twitter, you often get access to coupons and deals that regular shoppers don’t know about or can’t access.

Sign up on brand websites. Similar to liking brands on social media, registering on the website of your favorite organic brand often signs you up for a newsletter that comes with coupons. For example, when I registered on the Stonyfield Farm site, I was directed to its coupon offers.
Look for coupons in the newspaper. Common organic brands like Kashi and Newman’s Own have coupons in the Sunday paper and online at sites like Coupons.com. They may not be there every week, but if you look for them, I’m confident you will find them.

Look for coupons on the packages themselves. Every time I buy a Newman’s Own frozen pizza, there is always a coupon on the box for another Newman’s Own product. You know I cut those out and put them in my coupon binder. I’ve also gotten coupons for money off produce on certain cereal boxes.

Buy store-brand organics. Store brands are often cheaper than brand-name products, and many stores now offer their own version of organic products. Just this week Target announced it would begin carrying its own line of organic food under the Simply Balanced brand. Safeway has its O Organics line, and Giant as well as Stop and Shop have Nature’s Promise. In fact, if you search the website of the supermarket nearest you, you’re likely to find a store-brand organic line.
 
Leah Ingram is a freelance writer, lifestyle and frugal-living expert, and founder of the Suddenly Frugal blog. www.suddenlyfrugal.com She is the author of Suddenly Frugal: How to Live Happier and Healthier for Less, which compiles Leah’s unique money-saving advice, including how a family can save $25,000 a year. Her second title in the Suddenly Frugal series is Toss, Keep, Sell!: The Suddenly Frugal Guide to Cleaning Out the Clutter and Cashing In.

the unbelievable “un-pizza”

George Carlin had this to say about the tomato. “Something has gone afoul inside of a tomato. . ……. It doesn’t look like it’s finished. . . It looks like it’s in the larval stage or something.” The tomato can be a dividing line for people.

There are different varieties of tomatoes. They come in different shapes and colors. They can be a very deep red. Almost purple in color. There are some that are striped. The yellow tomato is a sunny, yellow color and are less acidic than the red tomatoes.

We couldn’t get to the grill last night with all the rain. we did the next best thing and roasted them in the oven. this recipe is past of our dinner menu in an effort to do Meatless Mondays. To do a vegetarian dinner, when everything looks so good at the market, is a relaxed menu.

This is what the guys called “the un-pizza.” For this, we use plum tomatoes. Slice off the tops and cut the tomatoes in half. Arrange on a baking sheet. Drizzle some extra virgin olive oil over the tomatoes. Splash some balsamic vinegar on them as well. Toss to coat. Salt the tomatoes with some Kosher salt.

Here’s a kitchen tip for you. Have two different extra virgin olive oils on hand. One for roasting and grilling. One for when the oil isn’t going to be heated in some way. A recipe like this isn’t when you use a pricey olive oil. Save that for when you’re making a vinaigrette and the oil is not cooked.

Roast the tomatoes in a 350 degree in oven for about an oven. The salt draws out the moisture in the tomatoes. The balsamic vinegar concentrates in flavor and deepens the sweetness in the tomatoes. The charred skins give them a smoky flavor.

Pull the tomatoes from the oven and allow to cool for about 10 minutes. Place in a blender and puree. the guys go outside to the pots of basil and pick some leaves.

Now it’s time to assemble the “un-pizza.” slice a dense loaf of baguette. Smooth some of the tomato puree over the top of the bread. Place a slice of a good quality mozzarella on top. Fresh mozzarella can be purchased in salted and unsalted versions. Get the salted for this recipe. chop some fresh basil and scatter on top. and be prepared for making many more. they gobbled up a whole bunch of these last night.

Tomorrow we shake things up a bit.

a little pie for dessert

Still riding the cherry wave.  Turns out I forgot about the mini cherry pies the guys like. This idea came about when I was making a pie crust one day. My older guy said he was only in the mood for “a little pie.” So, I surprised him at dinner with a little pie. Literally. Mini pies made in a muffin pan.

This is my foolproof way of making pie crust. It’s a method I learned called 3 to 2 to 1. It refers to the ratio of ingredients. Three parts flour. Two parts fat. One part cold water. The fat is one stick of butter. Make that a cold stick of butter. You want to work with cold ingredients when making a dough.

This dough can be made in a food processor. You want to use the dough blade. The dough blade is shorter than the regular blade. It’s made of plastic.

Slice the butter and add to the flour. Pulse a few times until the dough and butter combine. This should look like small pebbles.

Start to add the cold water to help the ingredients combine. When the dough pulls away,  the dough is done. Be careful to not overwork the dough. 

 Turn the dough out on the board and shape into a disk. Cover with plastic wrap and place in the refrigerator for 30 minutes.

When the dough is ready to be used, flour the board you’re working on. Roll out the dough. Choose something round that’s a little larger than the holes in your muffin tin. This can be a glass or a ramekin. Use this to cut out rounds of dough and place in the wells of the muffin tin.

Use a knife to pierce some holes in the bottom of the tins. There are fancy pie weights available to keep the pastry from puffing when baked. But you don’t need those. Dried beans work just as well. Keep a jar of dried beans in your kitchen cabinet for this purpose.

Bake the mini pie shells for about 45 minutes in the oven at 350 degrees.

In a separate bowl, combine cherries, some lemon juice, and a dash of honey. Pour the mixture in each of the baked mini pie crusts. You can cut some slices of dough to make a lattice top for the mini pies. Return to oven for about 8-10 minutes to bake the top pieces of dough.

Will we have another idea for cherries for tomorrow? Be sure and check in.

My Guys’ Pie Crust

1 1/2 cups all-purpose flour

1/4 teaspoon salt

1 teaspoon granulated sugar

8 tablespoons of cold butter cut into pieces

4 to 5 tablespoons cold water


a deep freeze when the heat’s on

One week of cherry ideas. What to feature next? Wait and see. From bruschetta to hand pies, the cherry has been fun to work with this week. Here’s one last idea to add to your kitchen’s offerings.

Fresh fruit, piled in wooden boxes at the farmers’ market, is the warm weather’s reward to us. As we worked this week, it’s plain to see that fruit can feature in any part of the family menu. We did pork chops and dessert in one week’s worth of recipes for cherries.

Who doesn’t want to capture fruit in the  prime of the season? In a few easy steps, the method for making jam with your freezer can be ready for tomorrow morning’s toast. The method was the focus of a recent article in Organic Gardening Magazine.  http://www.organicgardening.com/cook/freezer-jam-recipes

 If the thought of canning fruit conjures up thoughts of cooks in the kitchen, with pots of boiling water and glass jars, here’s another method to try.

If you can mash fruit in a bowl, and open a freezer door, you’ve got what it takes to make tasty jam for your family. You control the ingredients. And the amount of sugar. The flavors of the fresh fruit are not clouded by a host of ingredients. The natural snap of the fruit is the star of the show.

All you need is some fresh fruit, granulated sugar, and pectin. Get some plastic or glass jars, with a wide opening, for storing the jam. Wash and prepare the cherries. Mix some sugar and pectin in a bowl. In a large bowl, add the cherries that have been washed and pitted.

Stir in the sugar and pectin. Mash for about 3 minutes until the sugar and pectin are absorbed by the cherries. You don’t need a large amount of sugar. The sugar adds some sweetness to the jam. It’s also in there to discourage any growth of bacteria.

Using clean jars, spoon the cherry mix into the jars. Leave a gap of space at the top of the jar. This allows for any expansion of the jam. Seal the jars of jam with the lids and let stand for about 30 minutes. It will allow the mixture to settle before going in the refrigerator or freezer. The jam can be stored in the refrigerator for about 7-10 days. In the freezer it can last for up to a year.

If you choose to freeze the jam, you will let it come to room temperature in the refrigerator when you are ready to use.

That was easy. Cup of tea and toast with jam?

let me lend a helping hand pie

No, you can keep it. We chug on with the cherry talk. The plan was for today’s  post to be about making some empanadas. Summer is almost here. Today, we would talk about empanadas with a fruit filling of…well, you know.

Something magical happens when you are in synch with someone else. It happened this morning when my email from smittenkitchen.com http://smittenkitchen.com/ landed in my inbox.

It’s one of my favorite sites. And what had the wonderful Deb Perelman posted about? Hand pies. The same sort of  idea as an empanada. Whatever you want to call them, the process basically gives you the same summer fruit pie experience in your hands.

Go ahead and use some pre-made dough available in your market. Dust your cutting board with some flour. Here’s a tip for you. Did you know the way to create the smoothest floured surface is to toss the flour almost sideways across the board? This ensures a surface free of clumps of flour.

Prepare the cherries as we have done all week. Rinse with water and grab the cherry pitter. For this recipe, we are going to put the cherries in a food processor. Pulse several times. Add a little sugar. You want the cherries to be smaller in size for this recipe. A lumpy filling is not what you want for the pastry puff filling. For these hand pies, we are using 5 ingredients: flour, pastry dough, cherries, granulated sugar, and egg whites for an egg wash.

Roll out dough from the package.  Sprinkle a little flour and smooth on the surface. Cut the round dough right down the middle. Use a slotted spoon to put the cherries on the pastry dough. Place the filling on one side. Stay away from the edges. Take bottom half of dough and place over the cherries. Press the edges to seal. If some cherry juices run out — just wipe up. Use a fork to press down on the edges. It looks pretty and it seals the edges one more time. 

Brush with the whites of  1 egg. Give the pies a sprinkle of sugar. Place in the oven at 350 degrees for about 45 minutes.

These cherries are not pre-cooked. The sweet cherry taste will intensify, as the juices are heated, and surrounded by a buttery crust. My guys like the crust-to-fruit ratio in these hand pies. More crust!

Taste summer in your hands. Let the cherry juice drip down your arm. It’s summer. Let it go.

completely clafouti

I remember the first time I heard about clafouti. It was in a bistro. A woman at the next table had something that looked like a souffle. I asked the waiter what it was. His reply? He glanced over his shoulder and quickly answered, “Oh that? You’ll love it.” No more information. It was a cherry clafouti. And I did love it.

I’ll give you more of an explanation here. A clafouti is a custard-like baked dish with fruit. The clafouti I had that day was on a warm night. It looked like the perfect dessert for a June dinner. The egg custard studded with bright cherries. Garnished with a sprig of mint and what looked like creme fraiche.

Clafouti is a dish where some like it as a custard consistency. Some prefer more of a texture resembling cake. Either way, the method is still the same. Scatter the fruit in the bottom of a buttered baking dish. Pour the mixture of eggs and milk over the fruit and bake. This is not the time to use a spring-form pan. It will leak out from the bottom of the pan.

If you want to try your hand at baking, but are afraid to work with pastry, a clafouti is an option. This version features cherries, some fresh lemon juice and the zest, flour, some sugar, eggs, and milk. We like to top desserts with the mint that is doing so well in the garden.

Prepare the cherries. Mix the eggs, lemon juice, flour, and milk. Butter the bottom and sides of your baking dish. Sprinkle a bit of sugar in the bottom of the baking pan. Rotate the dish to get the sides too.

Place cherries in the dish and pour the egg and milk mixture over them. It will resemble a thick, pancake batter. Bake in the oven for about 45 minutes until golden brown.

The clafouti will rise in the oven. When the warm clafouti comes out of the oven it will look like a puffy custard with glistening cherries. It will deflate as it cools.

The egg custard flavor is a creamy background for the tartness of the cherries. Some clafouti recipes call for cherries that haven’t been pitted. The thought is that the pits lend an almond flavor to the dish. We’re not taking those chances. If someone is missing an almond flavor in the clafouti, we’ll add some almonds. You can eat almonds. You can’t eat cherry pits. Or, you really shouldn’t.

We still have some ideas for working with cherries. Stay tuned.

life is just a salad bowl of cherries

Remember the wonderful combination of goat cheese and cherries? We’re going to revisit that duo in the form of a salad. A warm goat cheese salad with cherry vinaigrette. Make your salad the main entree for dinner with a few added touches.

The cherries are pitted and placed in the blender. Then, they are blended with some extra virgin olive oil, garlic, dijon mustard, balsamic vinegar, honey, chives, and kosher salt.  

http://www.marthastewart.com/852369/garlic-oil

The garlic is placed in a cold pan with the olive oil. Gently warm the garlic and oil. The second you start to smell the garlic it tells you the process is complete. Remove the garlic and allow the oil to cool.

Wash salad greens and let dry. To make the warm goat cheese, form a small well out of aluminum foil. Slice some goat cheese and place in well. Drizzle some olive oil on the goat cheese. Spread some dried bread crumbs in an even layer. Add a pinch of salt.

To adjust the seasoning, you want to taste the vinaigrette. The best way to test how the vinaigrette is seasoned is to taste it with a salad leaf.

Toss some sliced almonds in a dry pan on a low flame. Keep the almonds rotating in the pan to evenly heat the nuts. It takes about 1-2 minutes to toast the almonds completely. remove the pan from the flame. Let the almonds cool.

One of the ways to ruin a salad, is to toss it too soon, or to use too much dressing. Here are two ways to avoid these situations.

If you are assembling the salad ahead of time, put the vinaigrette in the bottom of the salad bowl. Don’t toss it until you are ready to serve.

Nothing spoils a salad more than overly dressed greens. The greens should be lightly dressed to keep the greens crisp. Instead of pouring the vinaigrette on the greens, run it around the side of the salad bowl. This lets the dressing slowly run down the sides of the bowl. Push the greens up into the streams of vinaigrette. If you think you need more vinaigrette, repeat the process.

Set the broiler to low. Put the aluminum foil well with the goat cheese under the broiler. Keep a close watch. The cheese can go from slightly brown to burnt quickly. The goat cheese will brown in about 1 minute.

Toss in almonds and place goat cheese on top. We’re getting ready to close out our first week of the blogathon!